This is a tutorial based on my experience and trailer - your miles may vary!
Supplies:
 |
| Regular old drill bits, cordless drill, tape measure, Sharpie, drive bits. A mounting bracket is in the middle of the photo. |
Hardware:
The Organized Barn and Trailer does not supply mounting hardware, you need to buy that yourself. In my aluminum studs, which are 1 1/4" deep, I used #10 x 1 1/4" screws. With the screw head and the width of the mounting bracket, these were as long as I could go without punching through the back of the stud. There are four holes per mounting bracket, but I only could use 2 based on the size of my studs.
Note: You need to be careful what type of metal screws you use on aluminum, as some types can cause a reaction and corrode or otherwise damage the aluminum. These should be okay as long as the coating doesn't wear off, which is something I'll keep a close eye on.

Step 1: Eyeball and Mark
I started by holding my gridwalls up where I wanted them, and eyeballing where the brackets would go. Make sure you have bars crossing the studs, that's the one screwup I had doing this: for one of the 1x4's, I mounted the top brackets without considering that there were no bars across the horizontal stud further down.

Step 2: Drill pilot holes
I used a 9/64ths bit after finding TOBT's recommended bit was too small for the #10's. With the drill on its highest power setting, I started slow until I had made a divot so the drill didn't walk away from my mark, then it was full power ahead until I punched through the stud.

Step 3: Screw in bracket
To avoid stripping the screws, I put the drill power down to about half and put a lot of pressure on the drill. Even still, the screw would get stuck going in sometimes. When that happened, I reversed the drill direction, then put it in forward again, over and over until it went in.
Note: DO NOT keep going if you hear the bit bouncing around on the screw head, the screw could strip and be stuck halfway sticking out of your wall with no easy way to get it out!
 |
| This is the setting I used for pilot holes, for screws I used 14 and 1 (about half power). |
Tip: If I felt like my marks were right on, I would do both pilot holes for a bracket and then both screws. But if I felt like my marks might be wrong, I did pilot hole, screw the bracket up, pilot hole, put the second screw in. It takes longer since you're switching back and forth between drill bit and driver bit, but it's more accurate. I never did more than one bracket's pilot holes at a time, it's too easy to screw that up.
 |
| I didn't trust this mark. |
Step 4: Hang gridwall on bracket to check for level and mark position of next bracket
You want to make sure the bracket is going to make contact with the grid and not be floating out in space. I put my bracket behind the gridwall and pulled up until I knew the weight of it was resting on the bracket, then made my marks.

Step 5:
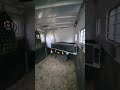
Pat yourself on the damn back, you handy woman you.

Anyone going to tackle one of these projects over the winter?


.jpeg)


5 comments:
I love how methodical you were about this -- my husband does most of my trailer renos and he normally just wings it 😂 which is why yours looks 100x nicer than mine ever will haha.
You're such a badass.
I will be doing nothing of the sort, but I have the same drill and thought that was worth a comment. It was my grad school graduation present. Because adult.
You say that, but I actually didn't use that tape measure and winged it. Lol. I was careful but I wouldn't call it methodical!
Heck yeah, everyone needs a drill. It's not an expensive one but it survived the renovation and is still kicking, along with its impact driver cousin.
Post a Comment